Choosing tile on an apron for the kitchen: 3 main points, to be aware
Today, design kitchen apron - it's not just the creation of practical, easy to be cleaned surface, but also the realization of the most daring and creative ideas, the use of original color combinations, the use of unusual materials. One of the most popular options is becoming provided a lot of options tiles. How correctly to choose a finishing material and what to consider when installing it on the wall?

The choice of wall tiles
To tile on an apron for the kitchen looked harmoniously with the overall interior, you need to properly define its size and color, decorative design. Typically include the height of the apron of the order 48-60 cm, selecting material in such a manner, to minimize its cutting. Universal solution is considered to be Wall Kitchen tiles 10×10.

Separately, planned clearance zone near the plate, because it is necessary to keep a distance from the cooking surface to at least extract 75 cm. 10 × 10 tile becomes relevant embodiment in this case.
The protective coating to fully cope with their features, We must take into account a number of recommendations when choosing:
- tile Kitchen apron on It should go a few centimeters under the countertop and the upper wall cabinets.
- Ceramic tiles 10 × 10, If such variant is selected, It should not have a porous structure, thus excluding the use of unglazed material.
- An ideal variant is considered to be free of joints and seams smooth wall apron, but in the case of tiles that result can not be achieved, so be sure is to treat seams and joints sealant based on silicone.

And another tip: with a limited budget to repair tile apron can be a central element of the situation against the background of neutral wallpaper, quiet floor, simple furniture facades. The main thing - to choose the most decorative option from those discussed below species.
Ceramics
This is most demanded embodiment finish working wall. Kitchen Tiles characterized by an optimal ratio of cost and quality, essentially giving the price increasingly popular wall panels made of tempered glass, plasty. The decision is considered the most elite tiles for kitchen Italy, impressive abundance of colors, original decor and stunning collections. No less spectacular is the Spanish tiles for the kitchen on an apron, offers a variety of specialty shops.
Wall tiles made of ceramics is not less than 20 age when selecting a quality option. To take care of such a surface is very simple - can be used as conventional detergents, and abrasive cleaning compositions. The only caveat concerns grouts, which eventually have to be replaced due to the darkening.

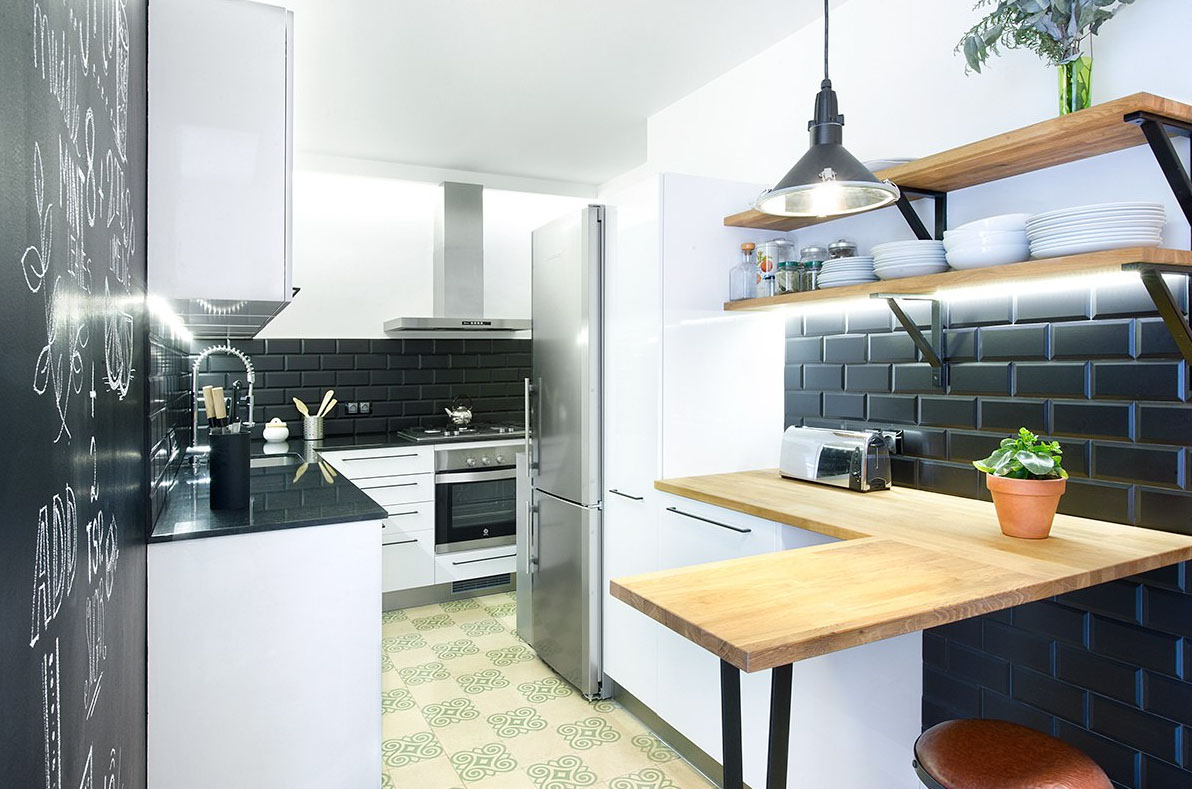
Special attention is given tiles "pylon" for kitchen, which is distinguished by a rectangular shape and small size, resembling a brick. Placed such products vrazbezhku, making available on the surface of the chamfered edges and chamfers look the most impressive, creating additional volume. Typically registration is selected and white tile of this type.
photo tiles
It is a kind of ceramics. Particularly interesting is this Italian tile for kitchen on an apron, wherein color saturation caused by printing high-quality images and processing, excluding the loss of appearance over time as a result of constant purges. Usually, collection includes tile for kitchen apron 10 × 10, which is a combination of color and monochrome products.

The cost of this option is considerably greater than the price of conventional ceramics, clean the surface of photo tiles can be only by means of, containing no abrasive particles.
Mosaic
Tiles for kitchen apron in the form of a fine mosaic focuses on an interior dynamism in the selection of juicy colors and emphasizes the elegance of the situation, when transitions are made of thin elements, tints which vary within a color gamut.
On sale there ceramic tiles for kitchen on the apron, simulating a mosaic. To work with such elements is very simple, unlike the original version, so stacking is carried out independently and in no time.
Glass
Glass tile in the interior looks especially luxurious and stylish, and, It is practical to handle. The quality is equivalent to ceramics, different durability, safety (due to lack of chipping at the cutting edges), marked on the product image does not fade with time, the surface does not absorb dirt and smells. The benefits include the addition of glass and special materials, silencers, giving transparency and creating a simulation of heterogeneity.

Glass tile is represented by the following types of:
- Enamelled products - characterized by staining with a specific color and standard sizes;
- Steklodekor - miniature elements putting some panels or mosaic;
- Steklomramor with corresponding simulated stone surface;
- Glass tile for the kitchen on an apron "Marble" - the glass has a certain shade, but preserves transparency.

design Features
For harmonious environment must consider the following points when selecting shade material:
- Tile for kitchen on apron 10 × 10 or any other size, provided the equipment facilities furniture set beautiful, It should be neutral.
- You can stay on the universal white version, which is appropriate with any finishing materials and furnishings. To add accents to suit some bright color inserts in mosaic or inlay with photo printing.
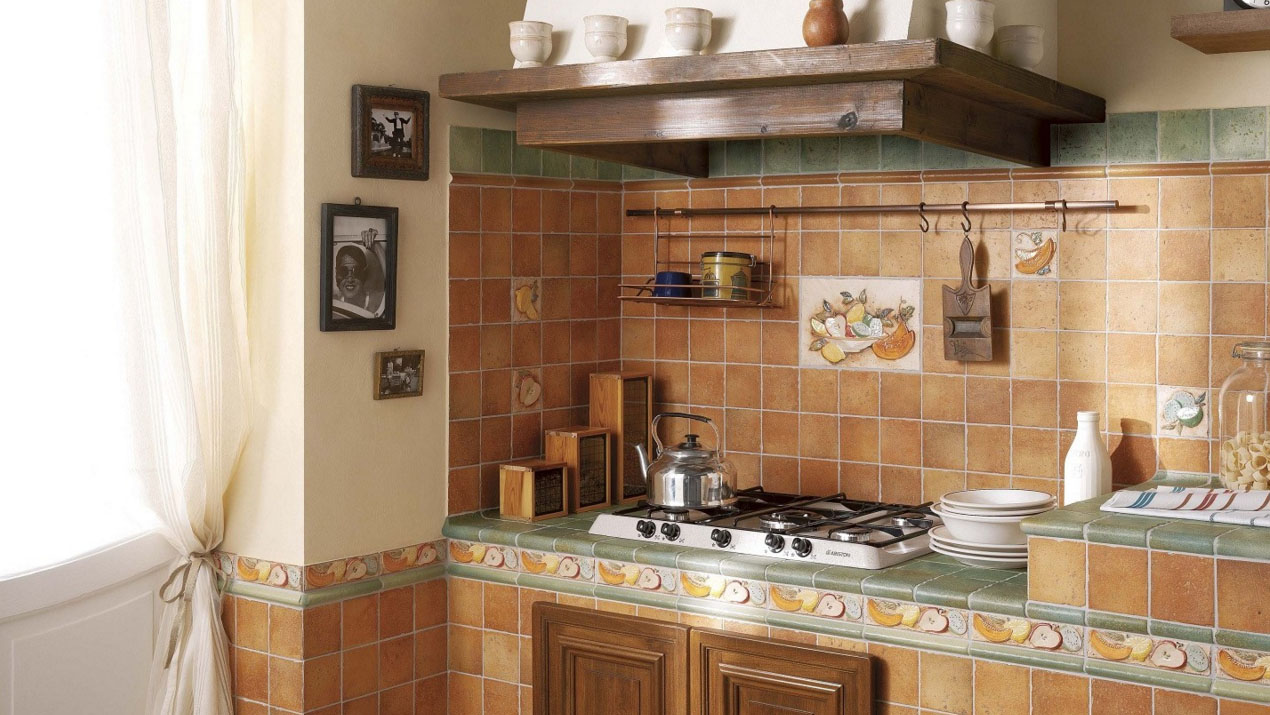
- apron green food can be done in beige, creams, coffee color. When undesirable contrasts, suitable green tiles for the kitchen delicate shades, which creates a feeling of freshness.
- If the interior will be present light green tiles, it's desirable, that it is slightly diluted with accents of gray or white.
- Green tile for kitchen on an apron - this is not necessarily monotonous boring option. You can select a picture summer nature with an abundance of lush greenery, Augmented bright meadow or decorative flowers, heavenly blue.
- Another detail, according to which the selected green apron in the kitchen, As for the color of countertops, which may be performed in the same shade or slightly contrast with the background wall covering.

Putting tools and materials
Regardless of, what options are laying tile in the kitchen will be used in the formation of the apron, to carry out work should advance to get:
- Glue for fabric, primer and Grout;
- spatula (and the usual gear, rubber) or trowel;
- Crosses jointing;
- level;
- And drill bits for forming holes in a wall coating;
- Capacity for mixing glue and pencil to mark;
- Equipped with a diamond wheel or grinder Tile;
- dowel.

How to start a workflow
Laying on the wall begins with the removal of old material, plastering and smoothing plane, otherwise the material will be based on the waves, creating unsightly picture. Then spend the markup, measuring out from the floor surface (It should be considered a fine finish) distance of about 75 refer to the level of, which will be 10 × 10 tiles or other wall clearance embodiment. After that, by drawing a line metered more 60 cm, denoting the upper edge of the tile. At the installation site kitchen hood height of the apron doing on 80 cm, and provide width on 10-15 cm greater plate width.
At the end of the markings on the designated area of applied primer, fastened on the bottom line of wooden beams or metal profiles, assessing its horizontal level by means of.
Features of the calculation of tile
To purchase the right amount of fabric, follow these steps::
- Measure the wall surface by the roulette, limited countertop, wall cabinets and hood;
- Calculate the area of the resulting apron;
- Measure the size of one element selected material, calculate its area and divided by the resulting value of the apron area. Extras include stock, increasing a calculated amount on 5-20%.

Recommendations for self-installation
To obtain a clean apron and neat, stacking perform, following recommendations:
- Prepare a special solution of the above manufacturer's instructions, making a small amount of adhesive at a time.
- Apply adhesive to the wall immediately to 2-3 tiles and make grooves with a notched trowel;
- Expose the front row, Considering, thickness joints when laying tiles corresponds to the size to be inserted between the individual elements of plastic crosses (no more 2 mm). Check the vertical and the horizon using a spirit level.
- If there is a thicker adhesive layer can be applied on the irregularities on the wall finishing material itself and make it similar furrow wall.
- In place of installation sockets in the tile cut by the crown of the appropriate size hole.
- After closure masonry remnants from the surface of the adhesive removed.
- After one day, was purified from residual adhesive seams, removed the dividing crosses, then using a rubber spatula between the rows is applied to tile grout. Wash the surface can be, when it is completely dry.

Putting yourself a glass apron
Place the glass tiles can also be independently, adhering to the following instructions:
- After leveling the surface, its cleaning and drying the cooked tile adhesive. You can use a highly adhesive waterproof white mounting adhesive as Ceresit 115 or a transparent one-component adhesive PCB-322, improving the appearance of the laid surface;
- For applying glue taken V-shaped notched trowel. The composition is applied uniformly and thinly;
- On the basis of each tile there is a clear plastic letter, which is removed before applying the adhesive. Tile with adhesive composition is applied to the wall and lightly pressed, excluding provoking damage to the strong pressure on the product. If there is surplus adhesive at the edges it is removed with a blunt knife. During the day touching the taped material is undesirable;
- When the process is completed, additional sealant joints are obscure and white grout, excess was removed with a damp sponge after 15 minutes. To wash the glass surface is possible through 3 days after laying.
Formed elements of tile apron serve reliably for many years. With the right choice to care for the material will not be difficult, and the surface will retain the original appearance throughout the service life.