Replacement of kitchen worktops
Often there is a need to replace the countertop in the kitchen and the reasons for this may be very different - from the banal to the destruction of the old coating during operation, to the desire to renovate the interior without changing the total garnish. Next, consider the order of stages of the renovation of the old countertop.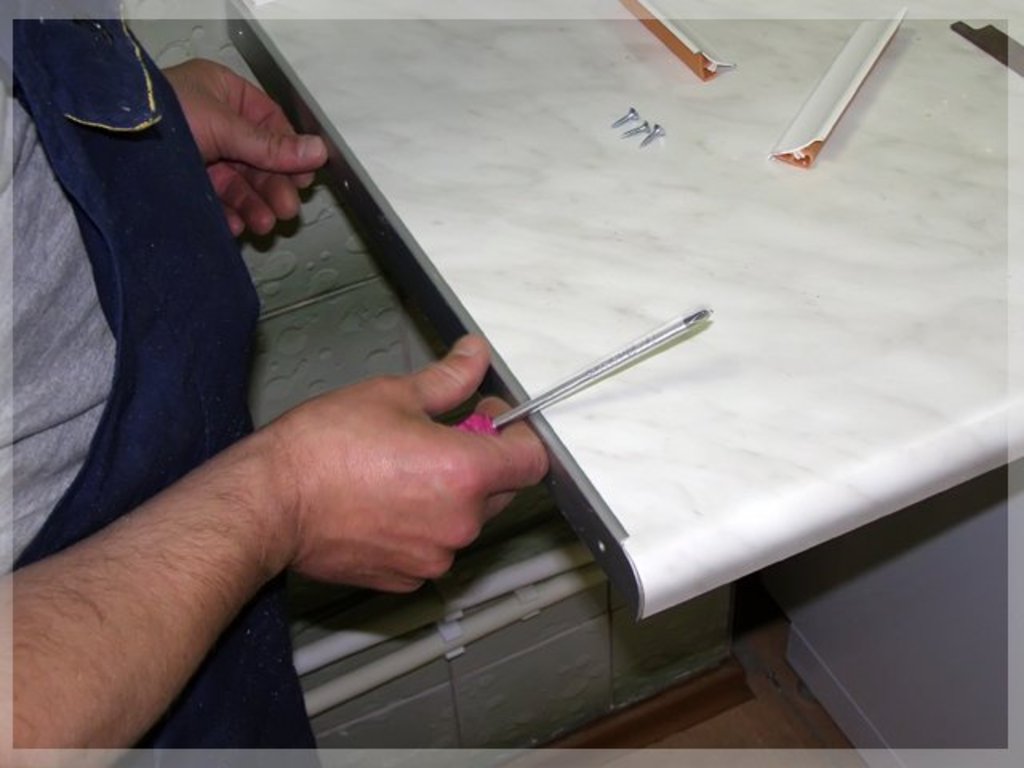
The choice of material for the right price
Of course, self-replacing countertops It begins with its choice. The most popular:
- Wood and laminate - characterized by democratic prices and a huge selection of colors and textures. In addition, it is not difficult to install on their own, without the involvement of specialists.
- Stone - almost perpetual option. Easy to operate, excellent withstand contact with water, Hot and sharp objects. However, not all headsets can withstand its weight, about 50 per kg 1 m. P.
- glass pretty, stylish, durable and hygienic. But it is unlikely to be able to install it yourself.
Let us MDF countertop installation process with their own hands at home.
replacement the kitchen includes several stages:
- dismantling the old countertops;
- exhibiting lower row of cabinets on the level;
- cut at predetermined sizes;
- slice processing;
- Box washing and cooking surface;
- installing baseboards.
Preparing for replacement countertops with their hands
- Countertop sawn given the dimensions. Treat it ends with silicone sealant.
- Bolted aluminum end strips.
- These strips are suitable, if the slice level, but sometimes there is a desire to make the edge of the Radius, in this case it is necessary except. At home, you can glue the melamine edge
Melaminovaya (paper) edge refers to a segment of the lowest cost. Many complain about the quality of, but if the treated surface is outside the direct ingress of water and home neat kitchen users, the operational period of a very impressive edge.
Installation of chipboard edges: not for the foldout table
- At the cut surface glue is applied and spread over the entire area of a thin spatula. Apply the edge and carefully press down.
- Heating the building dryer, smooth wrapped in cloth with a wooden block.
- after drying,, cut excess edge, construction knife.
- The angle between the embodiments countertop attach a connective corner bar. When not enough length for the compound using T- shaped bar.
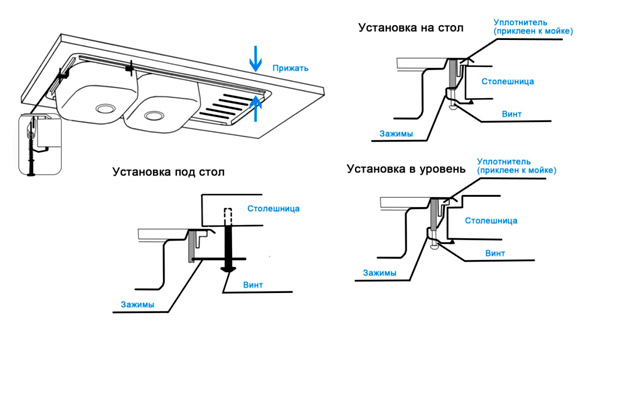
Installing the washing in the kitchen
- To reduce the possibility of chipping bonded masking tape. If washing oval or circular shape, it is applied to the section of the planned tie-ins and lead round. Then draws a extension, on which is carried cut. Typically, the inner core radius is smaller at 1.5 cm, facilitate the application can make a stencil. From thin strips cut fragment 1.5 mass media, applying it to the already marked contour, spend another. If washing rectangular process much easier.
- drill holes, through which is inserted a saw and a jigsaw cut.
- Silicone sealants are treated saw cut surface - even if somehow seep water, worktop not swell.
- Along the perimeter of the hole rim silicone low applied, Now cut down certain protected from moisture actions.
- The sink faucet is mounted with attached hoses for water supply, and set in the appropriate place. Pawl interlocks.
Installing the hob
The instructions to the cooking surface normally indicate the dimensions required for mounting hole. The rest of the process is similar to the installation of sinks.
When planning the location of the cooking surface, should be guided by the recommendations of the manufacturer and norms SNIP. Observe the distance from the plate to the washing, to the gas meter, water heater.
Bolted to the underside of the self-tapping screws to the side-bar, if necessary, use plastic corners.
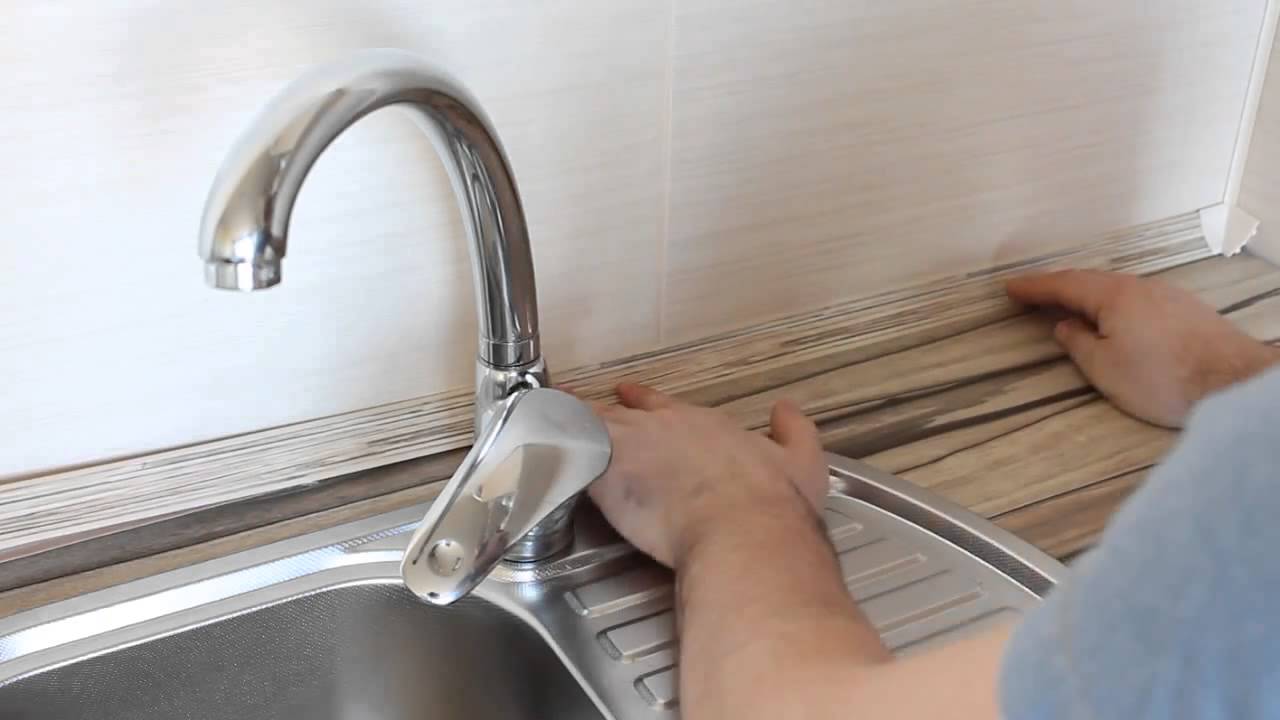
Installing the plinth as part of repair
Plinth mounted at the junction of walls and countertops. Its presence not only, It minimizes the chance of moisture in the rear section of, which is often not protected, but also significantly improves the overall appearance.
It consists of a plinth 2 parts, a mounting plate and a decorative edge. Separately acquire plugs on the ends and connecting corners, which are only for the right angles. Number of fittings is calculated depending on the configuration of the headset and its location. If the worktop is adjacent to three walls, must 2 corner and 2 plugs.
installation Procedure:
- Attach the mounting brackets to the wall with screws with a pitch 15 cm, sealing reliability.
- Decorative strip is inserted into the central through tool joint tenon groove. Complexities at this stage does not occur, easily installed, enough to press with your fingers, gradually moving on the entire length.
- Install connection brackets.
- Insert the remaining straps and put on caps.
A team of professionals to cope with the installation of a new cover for a few hours, but also independently, With a little effort and patience, You can cope with this task.