Topiary - Tree of happiness: 4 simple instructions for beginners
Ever since the ancient times known method of decorative trees and shrubs haircut for decorating gardens. The first mention of the crown of trees and bushes shaped clipping found in the ancient sources. Hanging Gardens of Babylon, or gardens of Babylon, the most famous example of this garden. In ancient times, greatly appreciated the master, who know how to create shapes, and composition of trees and other plants.
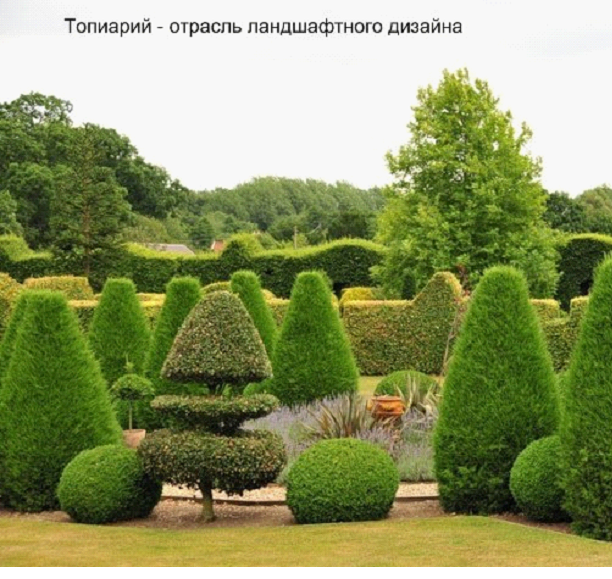
The peak of popularity of the art of garden design came in 16-17 century. The Russian fashion curly cuttings from trees came at the beginning of 18 century. Created magnificent works in the form of figures of people, animals. But it lasted not long, only a few decades.
Back to the art of Topiary 20 century. But now the term "Topiary" is increasingly understood souvenir, made yourself. It represents the original tree Thumbnail, made with their own hands and decorate with natural or man-made materials.
Topiary still often called tree of happiness, He is considered a symbol of happiness, peace and prosperity. Self-made topiary flower give any significant date.
variety of forms
types of Topiary: holiday flower, original paper, sea shells from, brightest of satin ribbons, floral pleated paper, beautiful for wedding, from beads
Topiary certain division into species is not, From what we can topiary it depends on the artist's imagination.
The approximate division of the compositions of topics: New Year, holiday, with natural materials, decorated with artificial elements.
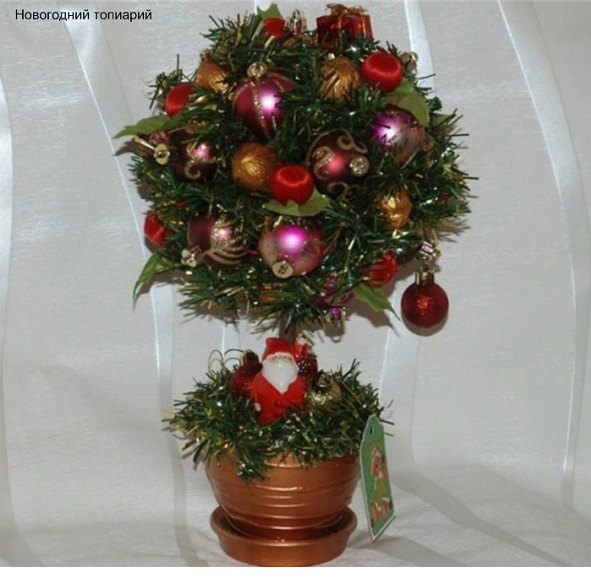
Holiday mood before the New Year will Topiary, made in New Year's winter style. These trees are a perfect fit in the interior of the apartment, office space and will be pleasing to the eye.
The materials used:
- cones, pine needles
- Christmas balls
- Mishura
- beads, rhinestones
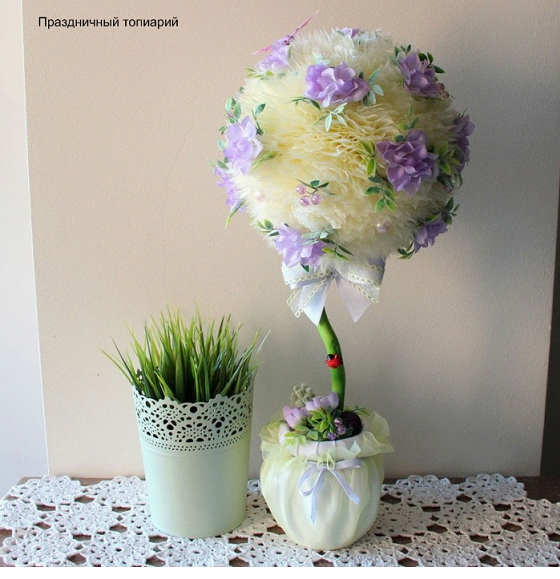
Tree of happiness perfectly fit for decorating the holiday table. In recent years also become popular to use wedding bouquets, in the style of Topiary. Souvenirs will be appropriate to give birthday, wedding anniversary, 8 Martha. A perfect gift for a celebration will be the composition of the:
- Organza
- sweets
- coin
- sisal
- Tape,
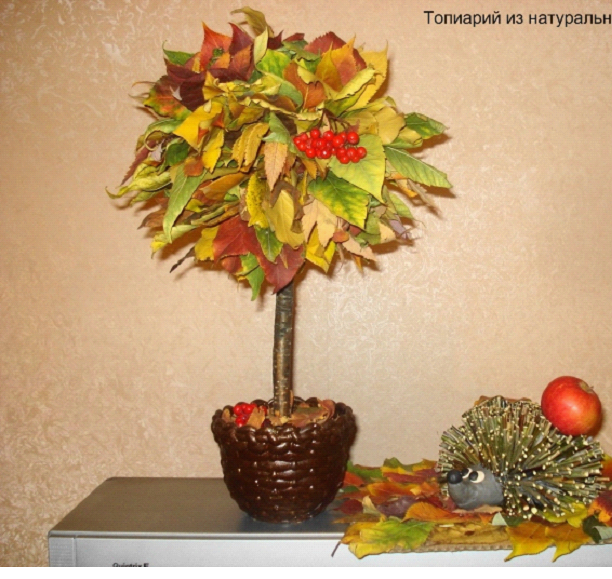
Trees from natural materials look natural, possess special energy. natural elements, which will be needed for the production of natural trees:
-
Coffee beans
-
nuts, sunflower seeds
-
Sand, shells
-
Pine and spruce needles
-
dried berries, fruits
Popular floral trees. Topiary outdoor big flower is often used for decoration. It will look spectacular in the room. Topiary with flowers can decorate:
-
Artificial flowers
-
Felt
-
Dried flowers
It looks beautiful topiary Bead, napkins, corrugated paper, newspapers, cotton discs.
This is not the whole list of materials, fantasy author's boundless, each person brings to the production of its own model of something new, puts soul. Trees of buttons, pasta, cloth scraps, you can see all of Topiary, that comes their way, even a huge outdoor topiary.
Materials for creating topiary
Topiary can produce almost any person, main thing to want. To find the right materials for the creative process and understand, how to make their own hands Topiary, the first thing you should understand, what elements it is tree of happiness. It consists of:
- ground (usually a ball)
- Trunk (support for the ball)
- Crown
- Stand (pot)
Grounds for Topiary
The base is generally spherical in shape. On the role of foundations suitable plastic and tennis balls. Special foam balls are sold in stores for such purposes. But do not necessarily buy-store balls, it is possible to make your own foundation. How to make a ball Topiary? We need plain paper or newspaper.
paper sheet to roll into a ball, then add the second sheet, and so on until it reaches the desired size. The advantages of this method is, that the size of the ball is changed as desired. The author decides, how many sheets it will be enough.
The resulting balloon newspaper wrap any available thread, otherwise it will start to disintegrate.
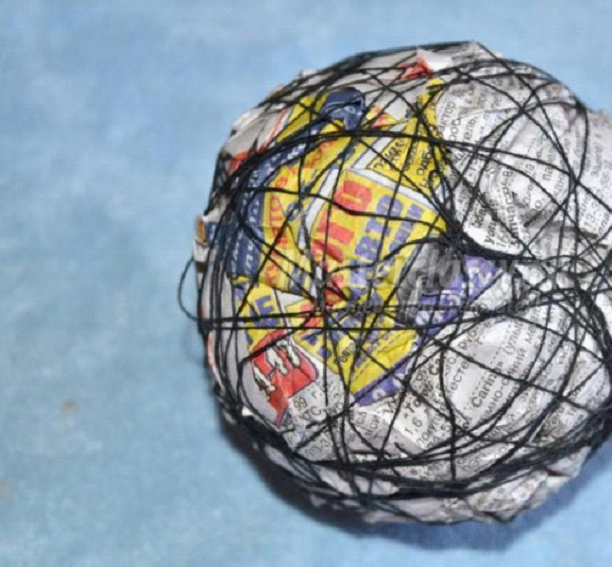
The basis is not only the spherical shape, other geometric shapes can be the making of the wire, shelves, branches. Beautifully will look Topiary heart of satin ribbons. Souvenirs in the form of heart are perfect as a gift for Valentine's Day or birthday dear person, wedding anniversary.
Trunk
Trunk to make a topiary using twigs of trees, špažek, skewers for kebabs, pencils, wire, but in general of all, that there will be any length and shape.
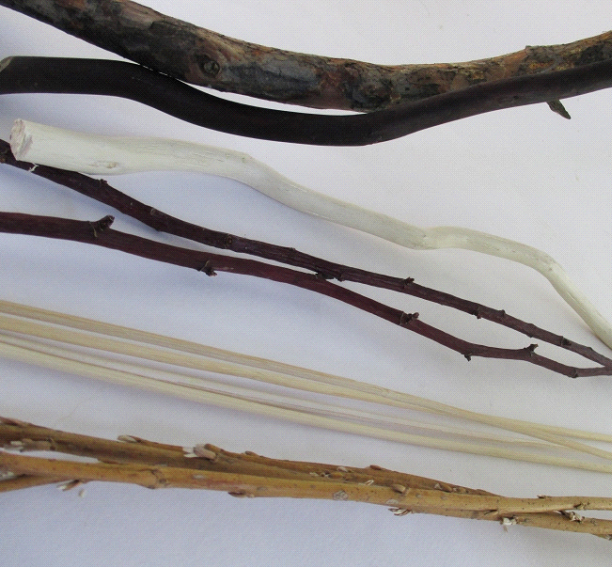
tree twigs should be dried, otherwise under the weight of the crown branch may break or change the shape and spoil crafts.
Barrel topiary decorated sorts materials. It is wrapped with satin ribbons, crepe paper, taped, twine, decorated with beads, rhinestones, flowers, buttons, coins. Topiary for different styles of the author picks up some decorations, which will create a unique composition.
Crown
To obtain manufactured or purchased ball used all, your heart desires: flowers, napkins, bumps, candies, buttons, coins, cotton pads, sisal, dried flowers, nuts, you name it. Huge scope for the realization of the ideas of the author.
Also need glue and a variety of needles, pins for attaching to the base material of the crown - ball. In the manufacture of topiary is sometimes more convenient to use the glue gun.
Stand
As a stand ideal pots of different sizes, plastic cups, bowls, circles, you can take the beautiful jars of creams under.
To decorate the stand fit lace, beads, napkins, braid. This is just a sample list of materials, how to decorate the pot Topiary, each author decides for himself.
How to make a topiary with his hands step by step instructions with photos
Consider the example of the instructions for the manufacture of certain types of Topiary, who under force, even for beginners. flower Topiary, coffee tree, tree of candies and wood, brings prosperity, decorated with coins. For the manufacture of unique topiary, you must choose the suitable materials in style. They must also be similar in color.
of napkins Topiary step by step guide
The easiest and cheapest option - tree decoration paper towels. Even novice authors can easily cope with it. This hack is an original gift, It can be used for interior decoration.
What you need to Topiary:
-
napkins (desirably different colors)
-
Glue
-
stapler
-
basis
-
pot (stand, Cup)
-
Gypsum (stucco)
-
Trunk (pencil, twig, skewers)
We start manufacturing of flowers from napkins.
First, add up the napkin in half, then again. I am supposed to be square.
In the center of the square by means of staples fastening the napkin crosswise, Napkin is now clings.
Scissors cut the edge, to get round. Not necessarily achieve the ideal form of the circle, let it be a little crooked. That will give a rose naturalness.
Each layer of wipes is detachable from each other, then lift up and a little rumpled. Separate the layers napkin from each other and so press down on top of each layer, while the layers do not run.
Gently straighten the resulting flower, it will be similar to the rosettes. If you make small cuts to the edges of napkins, the flowers are luxuriant.

take the ball, made of newspaper, and begin to glue it wipes. When tissues are glued, We need to wait, to dry the glue.
When the napkin completely glued, We go to the manufacture of the barrel. Stick wrapped with ribbon, You can use the shiny thread, and attach neatly to the flower ball.
Barrel with flower ball fastened to the pot. You will need plaster (stucco). Alabaster diluted with water, poured into the pot. Gently insert barrel in solution. When the mixture hardens, the trunk will hold fast in a pot.
Beautiful pot stands can be purchased at the store, but you can decorate yourself. ribbons suitable for this purpose, bead, balloons. Effectively looks pot zadekorirovat in the art decoupage, when the pot surface pattern is transferred. Take a cloth with a pattern (or cut pattern ), pot of the same color, PVA glue, sponge and water.
Putting a napkin with a pattern or portion thereof to pot, then the sponge is dipped into the water and PVA glue, We are putting a napkin and extends over the entire surface. Napkin sticks to the pot. After gently pat dry with a towel pot, to get rid of excess water. Pot patterned transformed.
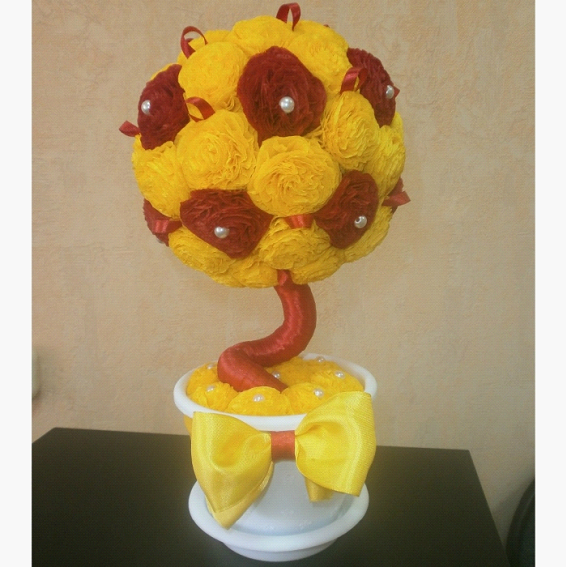
Cute Topiary own hands for beginners is over:
Tree from coffee beans master class
Especially appreciate the souvenir coffee lovers, because it looks original and exudes a subtle aroma of coffee. The process of creating such a masterpiece is quite time-consuming, It requires patience and concentration.
For the manufacture of coffee miracle required:
-
Coffee beans
-
The basis of any form
-
Stand (pot, Cup)
-
Trunk
-
Glue
-
gypsum mixture
-
Elements for decorating
Topiary with their hands out how to make coffee? Principle learn from the next instruction.
To start with the trunk wrapped with a tape, taped. Then prepare the plaster (alabaster water) and pour it into the palm. In the role of the stand can be a pot, beautiful empty jar. Often use mugs for coffee trees, there is shown a coffee. Omit the barrel into the mixture and leave until complete solidification.
At this time, the foam ball to begin to stick to one of the coffee beans. For convenience it is better to use the glue gun.
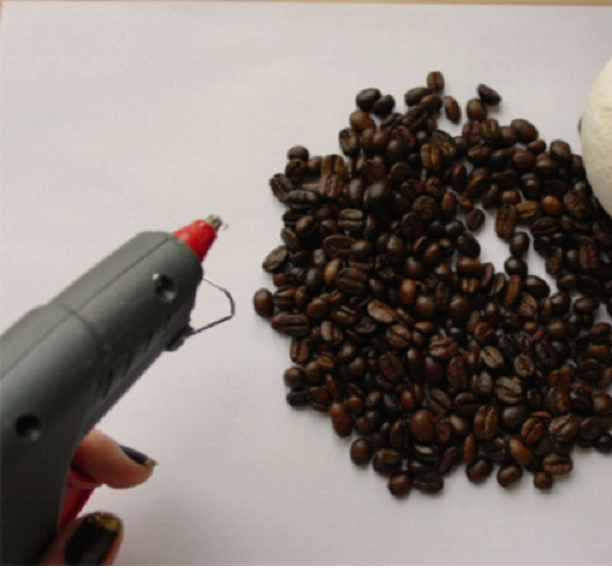
Carefully one begin to stick to the bowl of grain. We are doing so, that was less than empty space between the grains. Leaving room for the trunk. We put the coffee on the prepared bowl trunk with Stand. It is better to fix the ball to the barrel by means of adhesive strength.
What can decorate Topiary of coffee beans prompt fantasy. It may completely different improvised elements, look beautiful cinnamon sticks or slices of lemon, pre-dried. Topiary tree made of coffee beans ready!

Topiary of sweets, or the miracle of chocolates with their own hands
Such a tree can be used to decorate the table on holiday, you can donate to a children's birthday. Children will be delighted with such an original souvenir.
To create the required:
-
Styrofoam ball
-
Chupa-chups
-
Stick to the barrel
-
Pot
-
Gypsum
-
To decorate beads, candy
How do Topiary? Styrofoam ball pierces the stick, for strength promazyvayut place, where the ball pierced.
Cut the sticks in half lollipop, then gently insert them into the foam ball. How to make a crown for Topiary of candy can be seen in the photo:
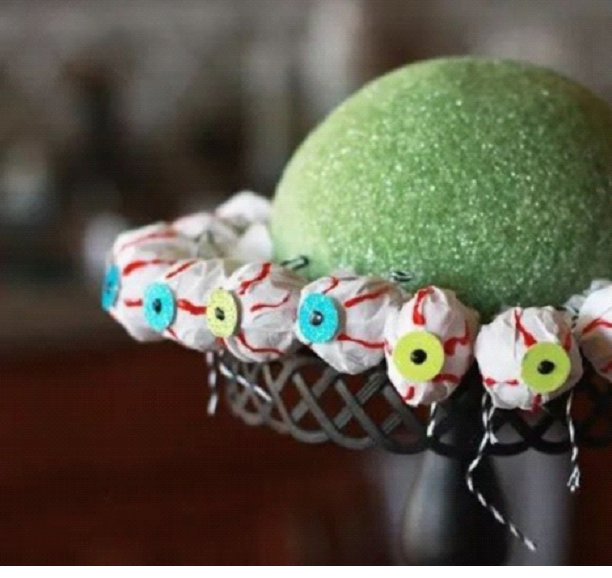
Fill gypsum mixture in a pre-prepared paste to a pot and a ball of sweets. stick, until the mixture hardens. The ball is obtained quite heavy.
It remains only to decorate the trunk and pot at the request of ribbons, beads, stones. Done!
Money Topiary master class
Money Topiary perfectly fit the interior workplace, a souvenir you can give colleagues or simply friends, or friends. Money Topiary - a symbol of prosperity. Material for a money tree using any dignity.
Necessary materials
-
Coins of all sizes and dignity
-
Foam ball or a homemade ball from newspapers
-
Glue
-
Trunk
-
Stand (pot, Cup)
-
gypsum mixture
-
Materials for decorating
Take the coin and one glue them to the bowl. Leaving an empty space for the trunk. The trunk is decorated with various ribbons, beads and attach to the foam ball, sizing carefully.
The ball get heavy, therefore necessary to select a strong trunk, and stand with the plaster mixture should he withstand. Otherwise, the tree just falls on its side.
You can buy a nice pot or jar in store. But not critical, if you make it yourself, plastic cup just pasted ribbons and attach beads, coins.
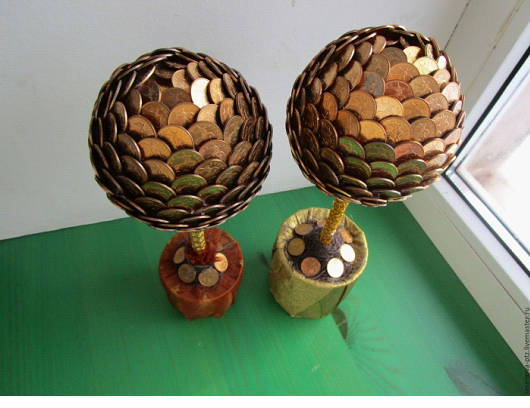
The gypsum mixture stand fill and insert money ball with the barrel. We leave on time, the mixture froze. When the mixture hardens, you can decorate it with coins. Everything, tree of coins ready! Money Topiary Photo:
Nothing complicated to manufacture in the, how to make their own hands no Topiary, the main desire and fantasy. The list of required materials is a sample, you can replace them with ease.
