Salt dough in the kitchen - make beautiful decorative panels
Make the kitchen a truly comfortable help interesting decorative details of the unpretentious material - salt dough. Today let's talk about the panel from salt dough.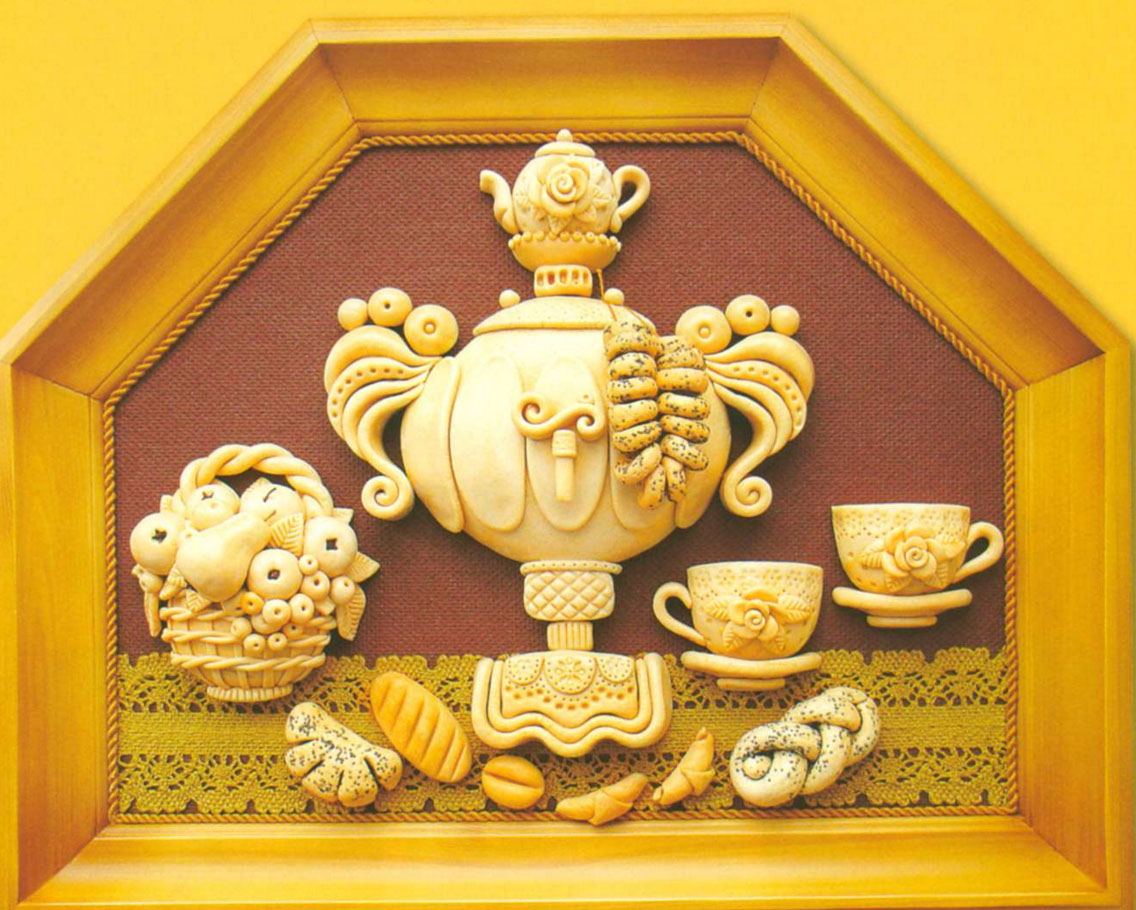
Originally from antiquity
History of the figures from the test has its roots in antiquity. Even in the times of polytheism inhabitants of the Ancient Orient fashioned from it his gods, and used them during the service.
In Europe, the theme of salt dough figurines were made at Christmas and Easter. The inhabitants of Scandinavia and Germany beckoning in its home success, decorating doorways wreaths and horseshoes of pliable material.
Pictures or panels from salt dough were very popular among the Slavs. advancing spring, and sculptured "larks" - a symbol of the arrival of birds and the awakening of nature. Pupa dough replaced kids toys. A gift from the salty test was seen as a wish of well-being and longevity. Any product from this material were considered a symbol of family wealth.
In China testoplastika known since the XVII century.
In such a simple case there are a few names. In scientific ranks, this process is called mukosolom and testoplastikoy. Flour products, salt and water called handmade ceramics and bioceramics. It would seem that, guileless doing business - lepish crafts from salted dough for children, and actually vayaesh work of art - hand-made pottery.
Salt dough - a unique material
The advantages of using the dough for sculpting:
Availability. The recipe of preparation is so simple, that the ingredients are always at hand. Flour, salt and water - that's all, need for articles made of dough with your hands.
Uniqueness. Products made of salt dough with your hands always have their own unique design. Even if the plot basis for the panels to the kitchen become famous picture, it will be filled with individual traits. Shades of colors and fine details in the hands of masters.
Simplicity. Modeling has no restrictions - neither by age, no experience. Modeling from salted dough for beginners will be no less interesting and exciting experience, than for skilled hendmeyderov.

Starting position: preparing dough
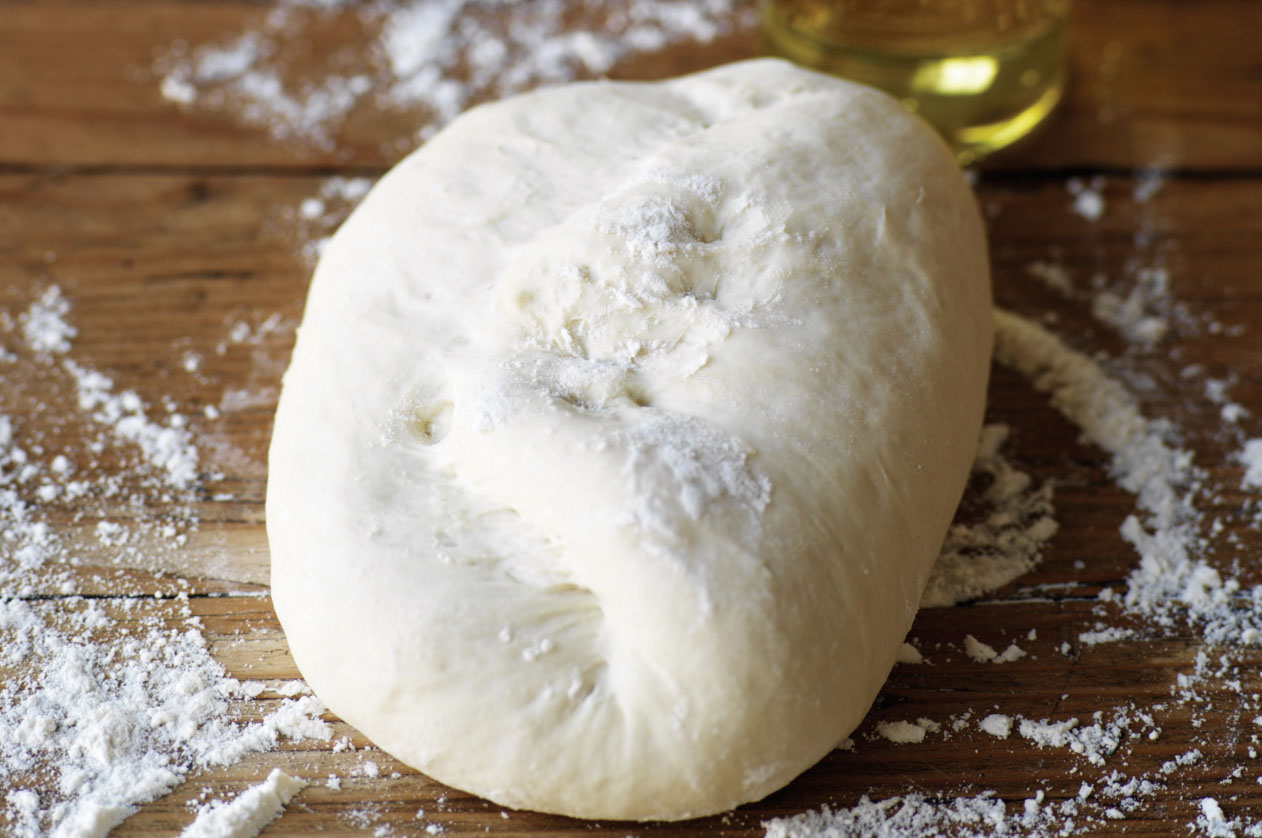
Make salt dough is very easy. It consists of flour, salt and water, and plants like dumplings. However, there are some secrets, the observance of which guarantees an excellent result. There certainly will not be better luck next time.
There is no single recipe for salt dough modeling. The addition of a certain ingredient gives properties. For added flexibility starch, for strength - Adhesive. If desired, you can make the dough diy color - add to the mix of paint (gouache or acrylic) or food coloring.
Recipe for salt dough crafts: 1 cup flour, 1 glass fine salt, 120-150 ml of water.
Recipe for flexibility: one and a half cups of flour mixed with half a cup of starch. Add one cup of salt and 180 ml of water.
dough recipe for increased strength crafts: Two cups of flour mixed with one cup of salt. Add 100 g. PVA and clay 80 ml of water.
To impart color used as natural dyes - carrot juice and beet, cocoa or coffee.
Fragrant crafts dough delight not only the eye. For the appearance of a pleasant odor you need to add flavor - vanilla or cinnamon.
Salt dough for sculpting - an environmentally friendly material. It has no additives, only flour, salt and water. Dyes - natural and those. This safe material for children's creativity.
beautiful, as best we can: tricks of the trade
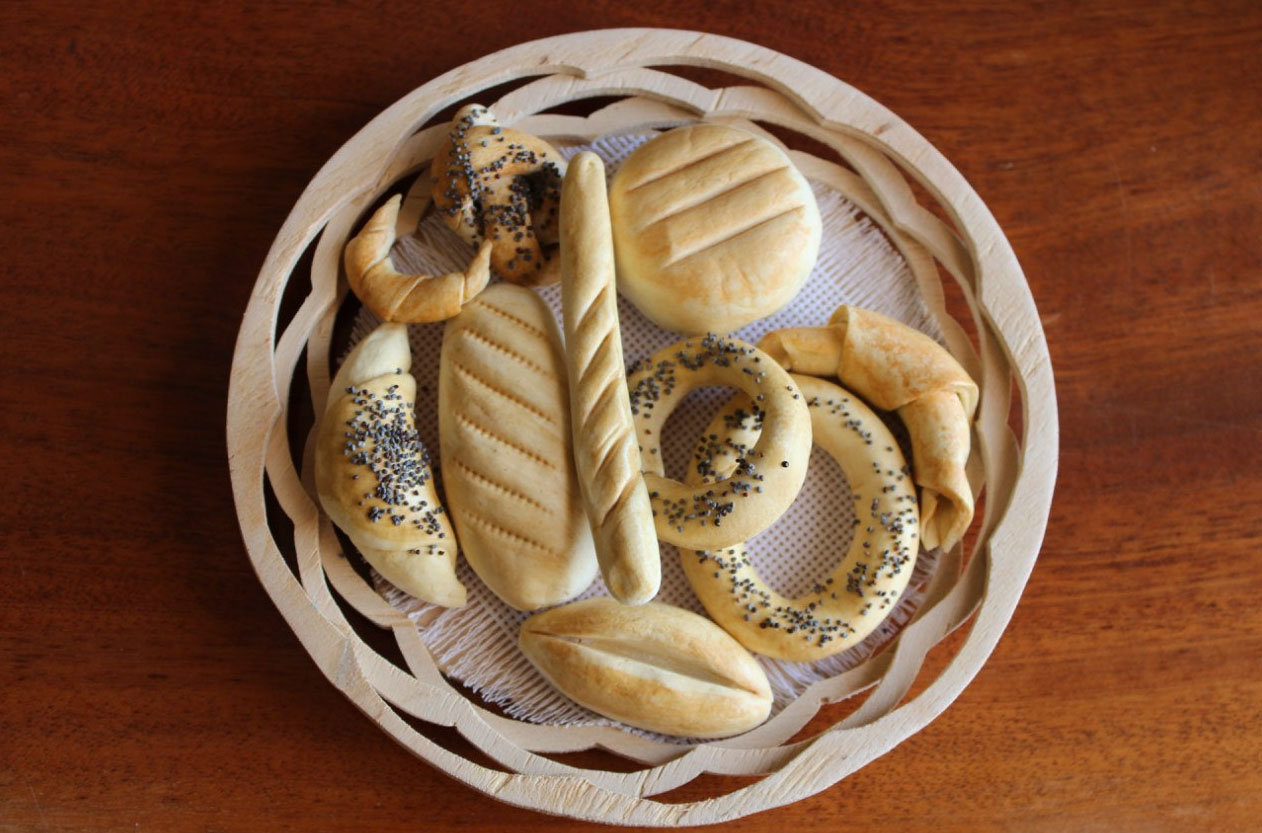
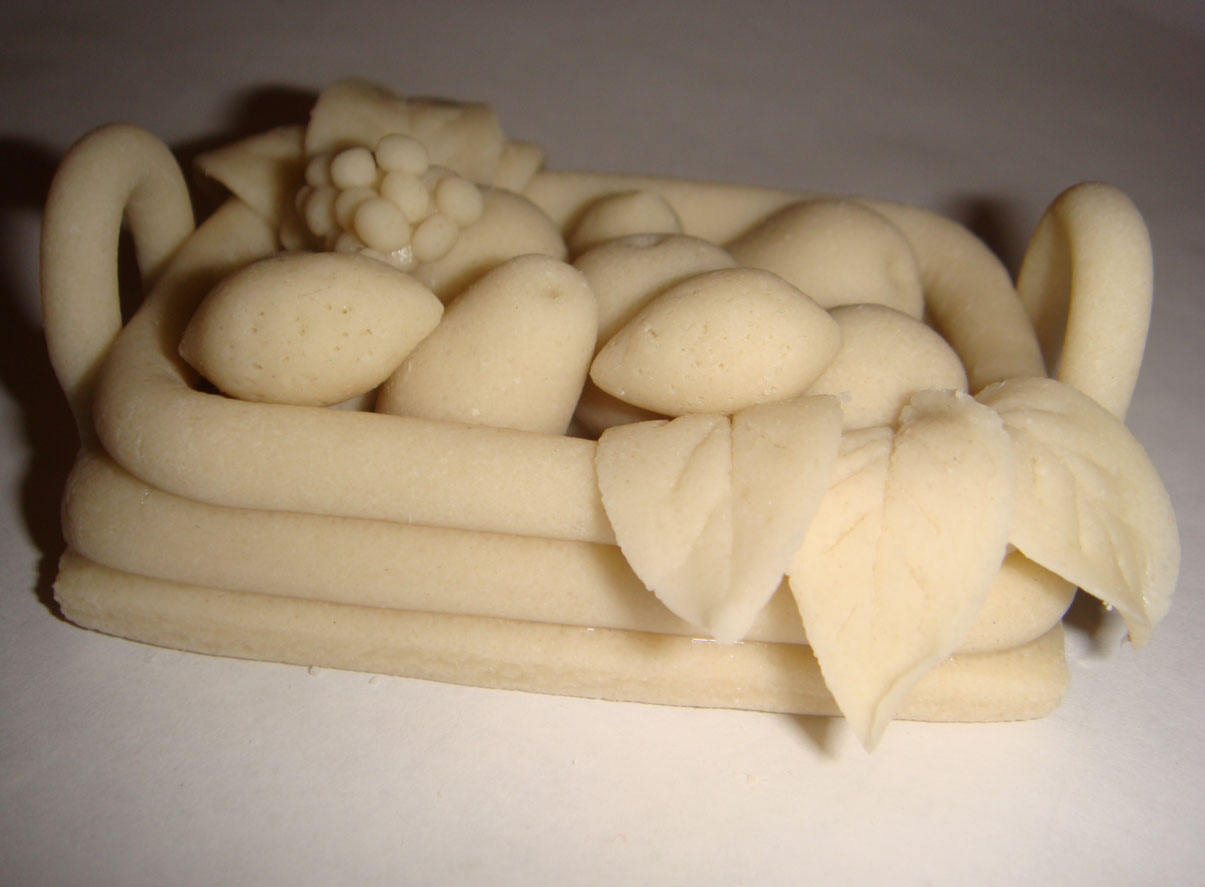
Panels made of salt dough with your hands can be of any size. Before you begin, it is desirable to make the layout of the future picture - think about composition and develop the main parts.
for example, panels on the theme of winter with your hands can consist of a snowman, Christmas tree and children, ride down the hills. The main parts: snowman, Christmas tree and children. They need to work out in advance: draw on the layout, they are located in the picture, what to wear, etc.. For the manufacture of large parts of the need to make the stencil - this will speed up the work.
Even if in the course of any changes in the original version, designed layout will not turn into a panel randomly distribute the elements. Premeditated composition of the painting of the salty dough with your hands will set the direction and will hold the imagination of the master within the idea of the work.

Tools for work:
- Plate for a molding of acrylic glass or plastic,
- Stack (Special stick for modeling),
- small rolling pin.
additional tools, which will be needed to give the heroes a unique look and characteristics:
- With the help of garlic press of the hero will be a great head of hair (for the same purpose suit yarn),
- Toothpicks are a great help to draw the smallest details,
- Invoice button to leave an unusual imprint and will create an intricate pattern.
scraps, thread, pieces of yarn, etc.. - all this is necessary to work out the fine details.
When the components of the paintings are ready, they are added together. The sutures treated with water for better adhesion. The next step - drying.
anchoring result: drying
The work can be dried in two ways:
- The gradual drying of the battery or the sun (in the oven at a low temperature).
- Annealing in oven at high temperature.
If no hurry, then use the progressive drying. In this case, the product is placed on the battery on 4-5 days. When drying in the oven, temperature must not exceed 80-85 degrees. In this mode, the product dries 60 minutes.
Do not dry the product of the salt dough in the microwave.
Roasting in the oven for drying large paintings. It is produced in two stages: first - upper product layer drying, second - firing.
To dry the top layer of the product it is placed on two or three days on the battery or in a sunny place. This will keep the texture of the top layer.
Roasting involves the panels in an oven with a gradual temperature increase 50 to 150 degrees. At too high a temperature (above 150 degrees) the product is deformed: bulges or covered with cracks. Bloating is not correct. Cracks easily smeared a small portion of water, flour and glue PVA.
To check, Do hack to dry, to gently knock on her finger. Muffled sound means, the product is damp, drying should be continued. Voiced sound is completely dried by diy.
After drying, the paint is applied to the picture. Acrylic or gouache - Free choice.
Ready-made panels for the kitchen is better to cover a matte or glossy lacquer. It permanently protects it from moisture, that is especially true for the kitchen climate. tell me, Is panels from salt dough in the kitchen is not beautiful?